Why I Build a Style Guide Page in Every Webflow Template
I add a Style Guide page to every template I make. It is convenient for the person using the template, and it is also what a quality template on the Webflow Marketplace is expected to include.
The page is for everyone who will work with the template: a designer setting it up, a developer customizing it, or a client adding new content. It shows every class that was created, how to use it, and how to scale or change it.
I do not work without one. A Style Guide gives a project clear rules and recommendations. That is why templates built this way are in demand: they are built carefully and do not break on the first customization.
You can see a live example in the Consilis template Style Guide and Noctis template.

What the Style Guide Page Contains
The page follows a fixed order:
- Headings
- Text styles
- Buttons
- Colors
- Spacing
- Components
Each block uses the real classes from the template, so the page doubles as a test: if something looks wrong here, it will look wrong everywhere.
Variables I Set Up
I group Variables into five collections:
- Colors
- Typography
- Spacing
- Gaps
- Border Radius
For typography I create every style that someone might need to change: font size, font color, line height, letter spacing and font family. Everything is defined once, so a change in one place updates the whole site.

Client-First Naming Rules I Follow
All names follow the Finsweet Client-First methodology. Examples from my templates:
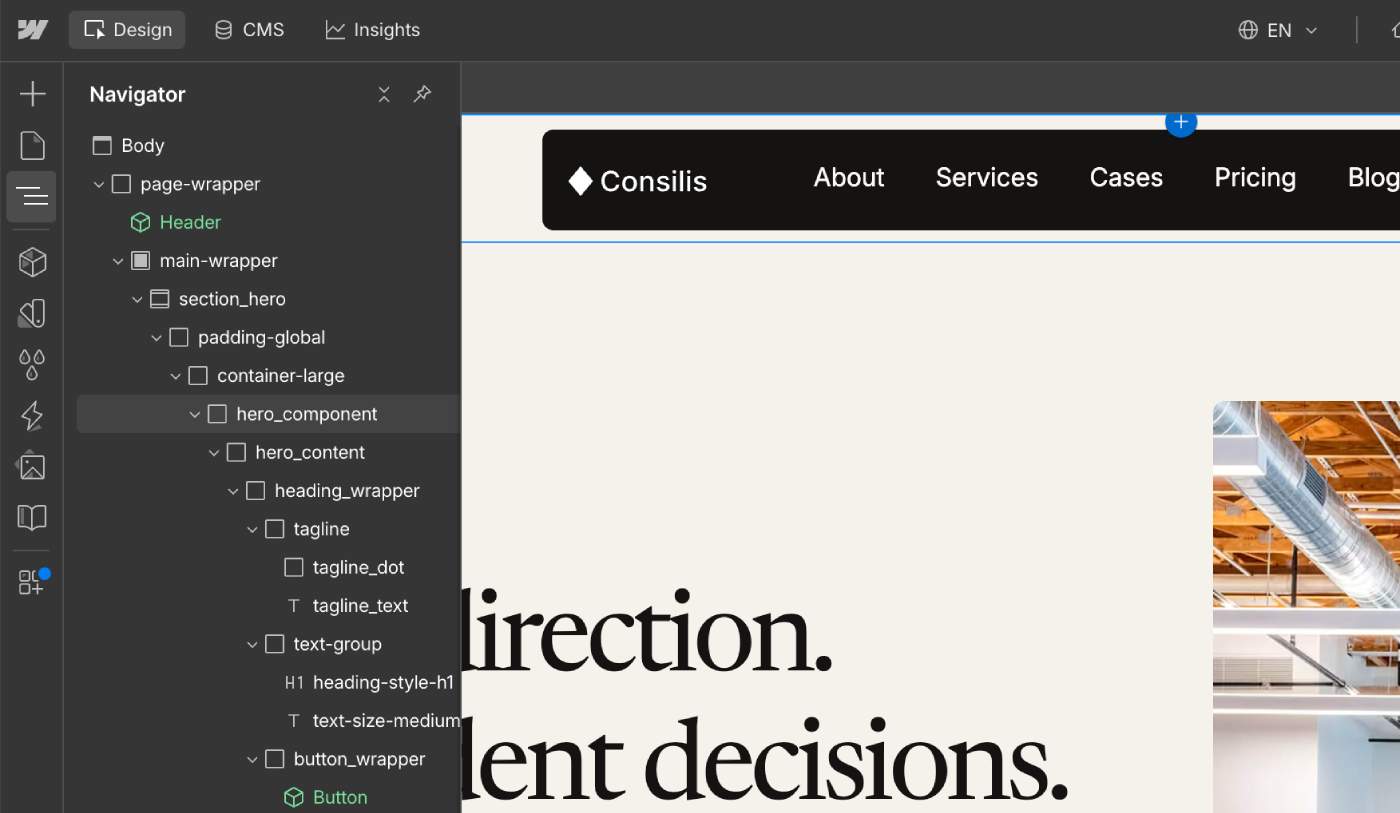
heading-style-h1,heading-style-h2,heading-style-h3for heading stylestext-size-medium,text-size-largefor text sizeshero_componentfor a componentheading_wrapperto wrap a heading groupsection_statsto name a section by its purposepadding-global,container-large,padding-section-largefor page layout
The result is a structure where a class name tells you what it does, before you open the Style panel.
My Build Order, Step by Step
- Design. Finish the layout first.
- Design system. Define colors, type scale, spacing and radii.
- Variables. Turn the design system into Webflow Variables.
- System classes. Fill in the classes for headings and all the text styles.
- Colors. Apply the color Variables.
- Fonts. Set font families and typography properties.
- Spacing. Apply the spacing Variables.
- Gaps. Apply the gap Variables.
Spending time on this at the start speeds up everything that comes after.
Mistakes I See in Other Templates
- No methodology. The template can fall apart almost immediately, and it is hard to work with.
- Empty class names. Elements without meaningful classes make customization guesswork.
- Too many headings used for animation. Extra heading tags added only to make an animation work get in the way of SEO.
- Figma-to-Webflow plugins. Some developers move designs over with a plugin and ignore the methodology, which produces messy structure.
How the Style Guide Saves Time
The Style Guide shows which colors are used, and the names of every text and heading style. I can find the class I need and change its properties in less than a minute. It also lets me see errors immediately and tell what needs to be fixed or improved.
Should You Hide the Style Guide from Google?
Yes. I set the Style Guide page to noindex. It is a working page, not content for search results.
My Advice for Beginners
Do not start without a Style Guide, a design system and Variables. Spend the time on them first and add the data they need. Your work will be much faster afterward.