From a Webflow Template to a Custom Business Website
A client contacted me after purchasing a Webflow template from the Webflow Marketplace for a branding studio. They liked the design and overall structure of the template and asked me to customize it for their own business and content.
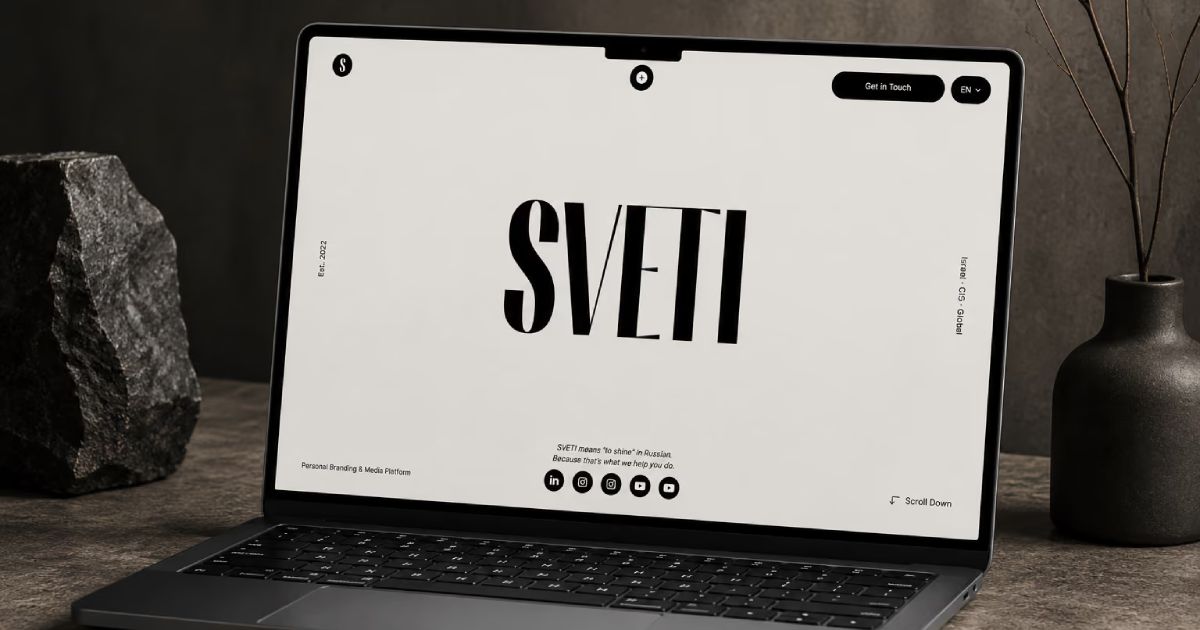
The client runs a marketing business with a Personal Branding & Media Platform focused on PR, media production, podcasts, personal branding, and helping people become more recognizable across social media.
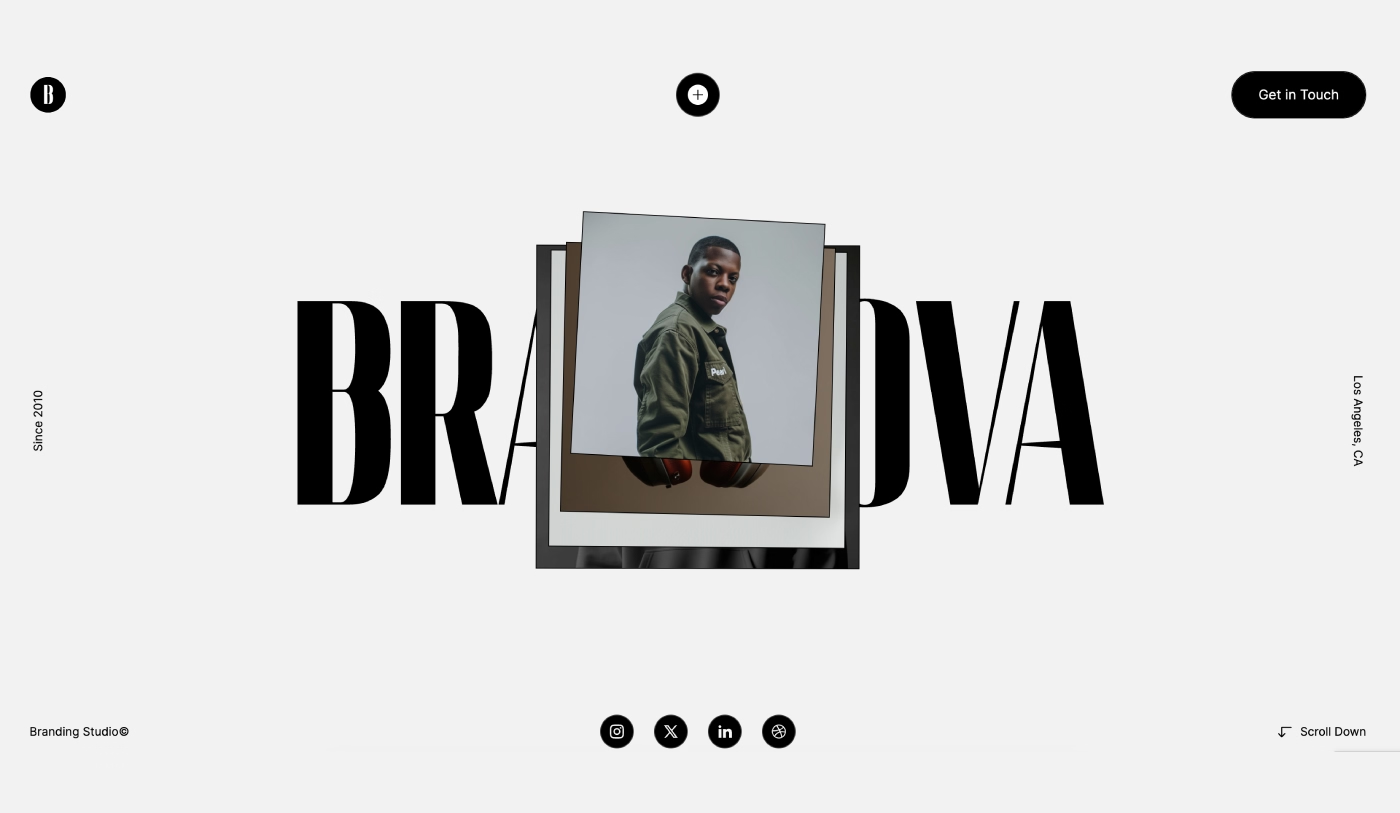
This was the template the client liked the most, so the next step was to adapt the existing Webflow website to the actual business requirements.
The customization included replacing the original content, reviewing the basic SEO settings, modifying CMS Collections, adding new fields to the blog, creating a new CMS Collection for case studies, improving the website structure for AI systems such as Gemini, ChatGPT, and Claude, and adding a second language with Webflow Localization.
During the process, additional requirements can also appear. This is a normal part of a Webflow template customization project. New content, sections, CMS fields, or structural changes often need to be discussed and added as the project develops.
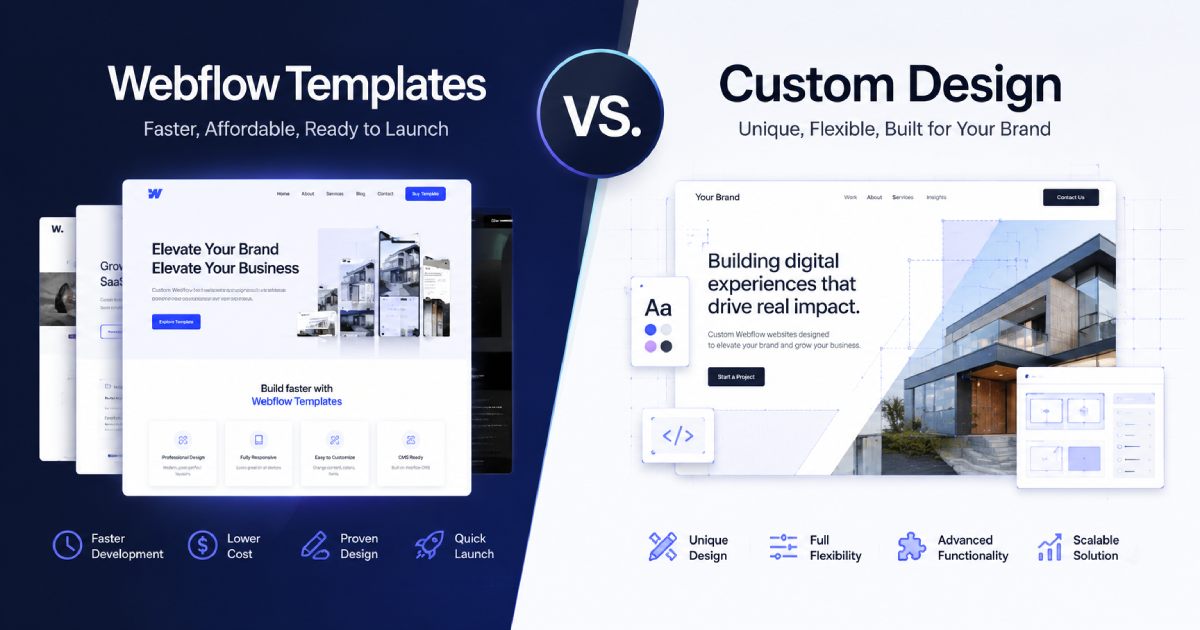
If you're not sure whether to choose a Webflow template or a custom website, I explained how to make the right choice in detail in this case study.
The final website was published on svetipr.com.
Reviewing Webflow Variables and the Design System
The first step was to review the existing Webflow Variables and design system before making any major changes.
The template was not the newest version, so some parts of the system required attention. For example, some values were still defined in pixels instead of rem, and some design properties that could have been added as Variables were missing.
The template already included Variables for the main colors:
- Primary Color
- Neutral Color
- Border Color
- Background Color
These colors already matched the client's requirements, so no major changes were necessary.
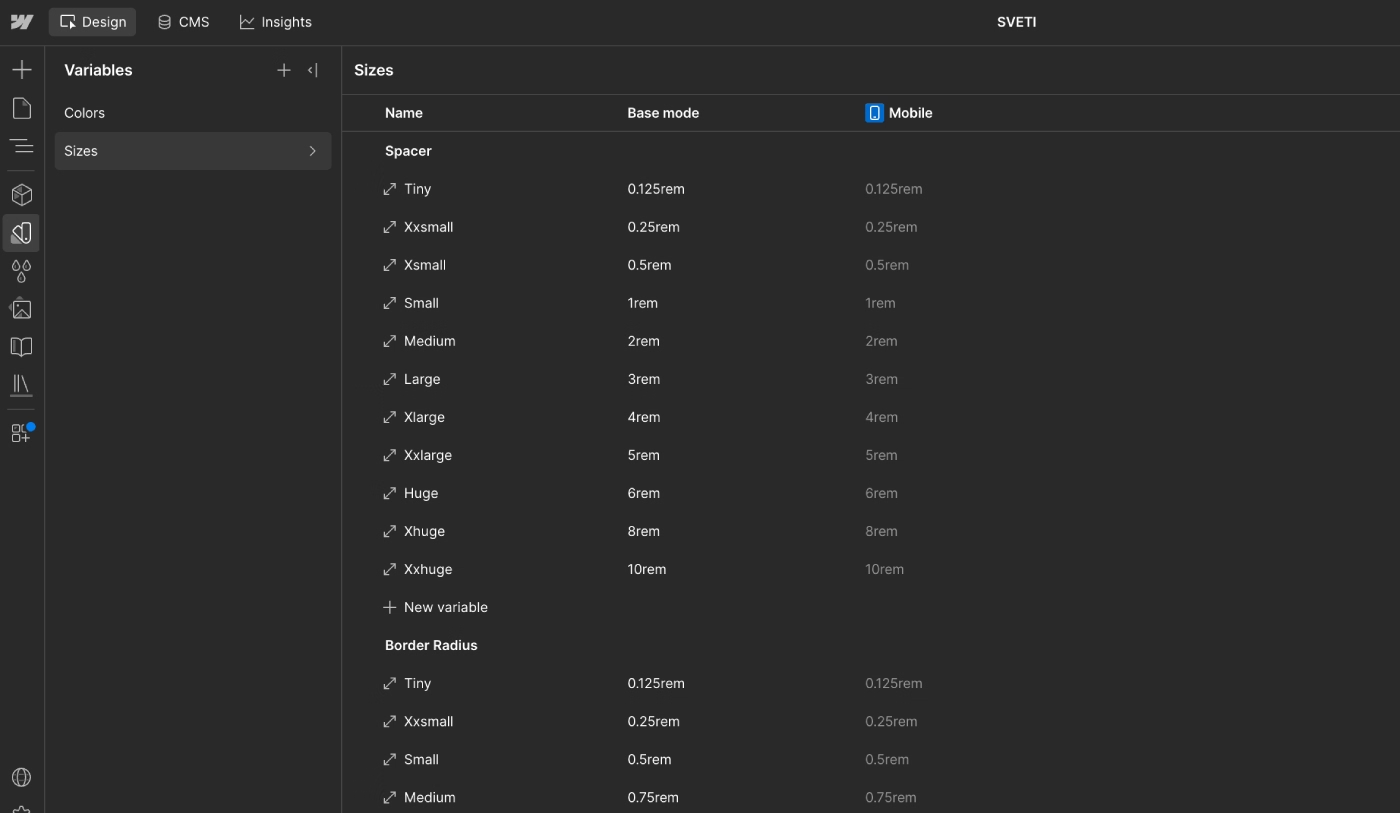
The template also included Variables for the main spacing values used for margins and padding, as well as Border Radius Variables for rounded corners.
This made it possible to update the visual system from a central location instead of editing individual elements throughout the website.
Adding Webflow Variable Modes for Different Breakpoints
The template included Variable Modes for the base design and mobile layout.
If additional values are required for specific breakpoints such as tablet, 1280px, 1440px, or 1920px, new Variable Modes can be created from the Webflow Variables panel.
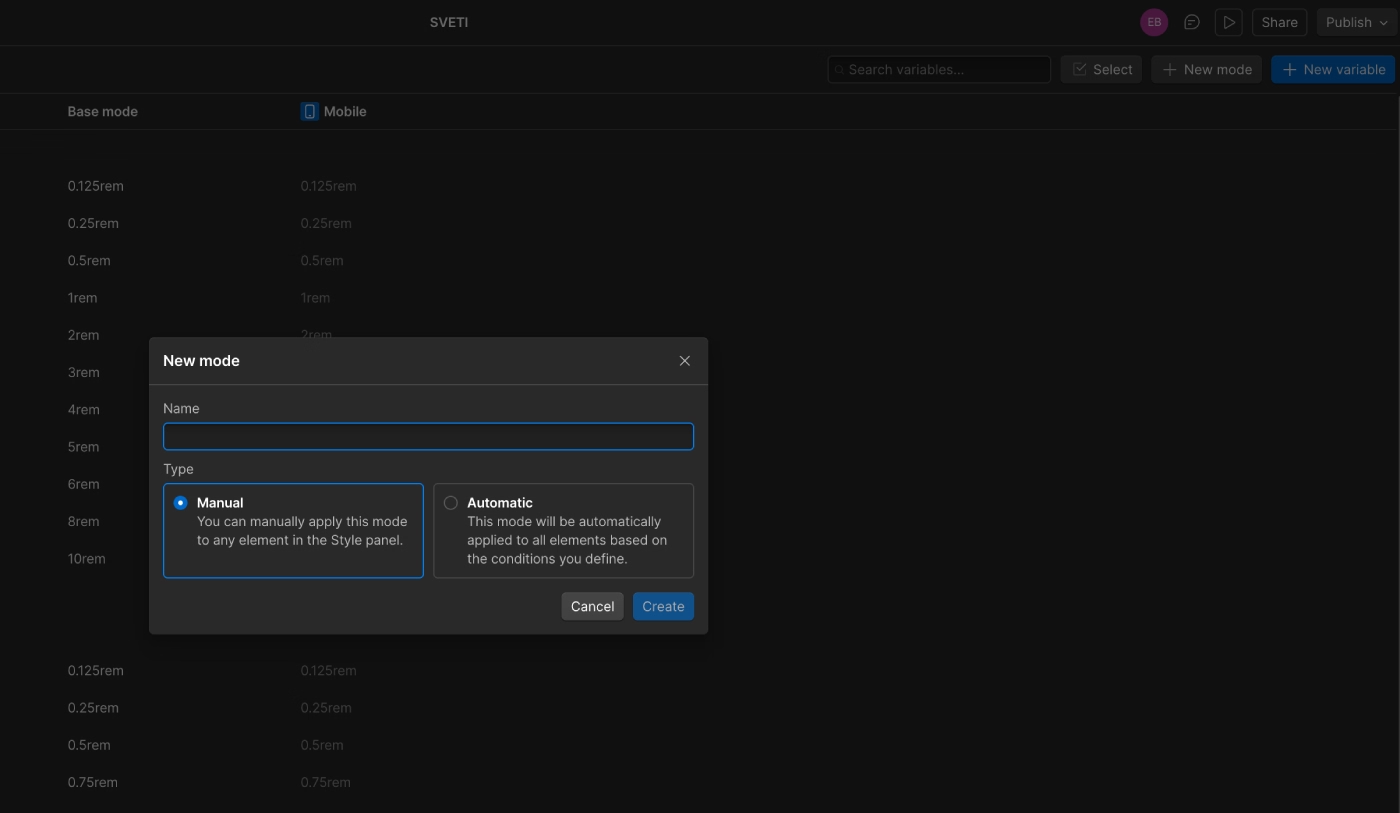
After creating the new mode, it needs to be connected to the appropriate breakpoint in the Style panel.
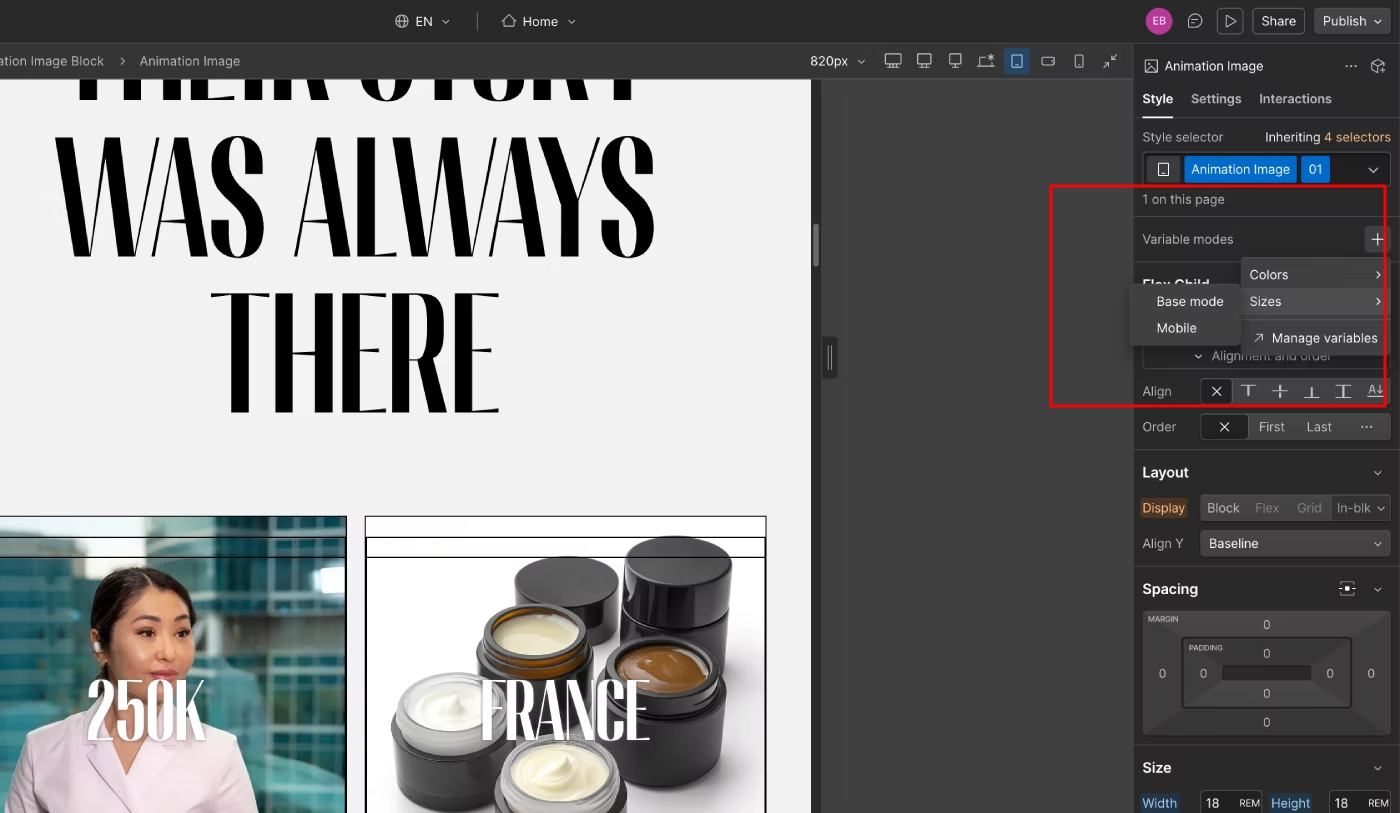
This step is important because simply creating a new Variable Mode does not automatically make its values active at a specific breakpoint.
I also reviewed the basic Style Selectors for headings H1–H6, links, unordered lists, ordered lists, blockquotes, and other standard HTML elements.
Replacing Text and Adding New Content to Static Pages
After reviewing the design system, I started replacing the original content on the static pages. This is where another important problem appeared: some headings were created primarily for visual animations rather than for semantic structure and SEO.
The pages looked good visually, but some headings did not work as proper HTML headings and did not provide a clear structure for search engines.
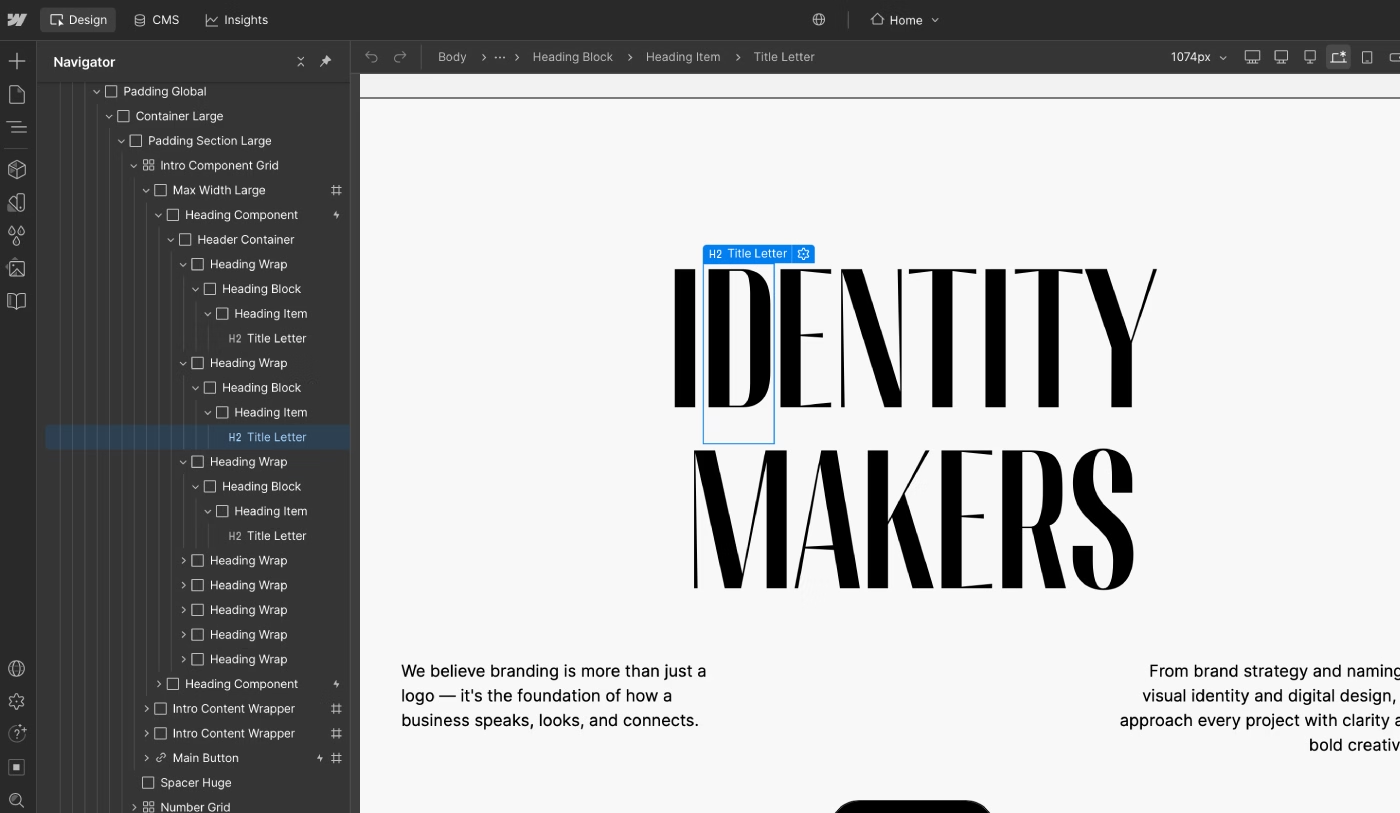
Each letter of the heading had its own H2 class. I explained to the client that this approach could preserve the animation, but it would create a poor semantic heading structure.
We had two options:
- Keep the existing structure for the animation.
- Rebuild the heading as one semantic H2 element.
The client chose the second option because SEO and content structure were more important than keeping the original letter-by-letter animation. The final heading was rebuilt as a single H2 element with one class.
This issue can also become important when adding another language with Webflow Localization. Different languages often have different text lengths, so a letter-by-letter animation may require additional classes, hidden elements, and language-specific variations.
The font is another important consideration before purchasing a template. If you plan to add another language, make sure the template's typography supports the required characters and language.
Other Content and Layout Updates
Several smaller changes were also made during the content migration:
- Added new Instagram and YouTube links with matching icons.
- Replaced the original images with optimized client images.
- Added new navigation items to the header and footer.
- Replaced the original logo.
- Created
sitemap.xml,robots.txt, andllms.txt. - Added three new service cards that were missing from the original template.
- Created a new Team Members section with the client's team.
- Created a new section showing brands and countries where the client works.
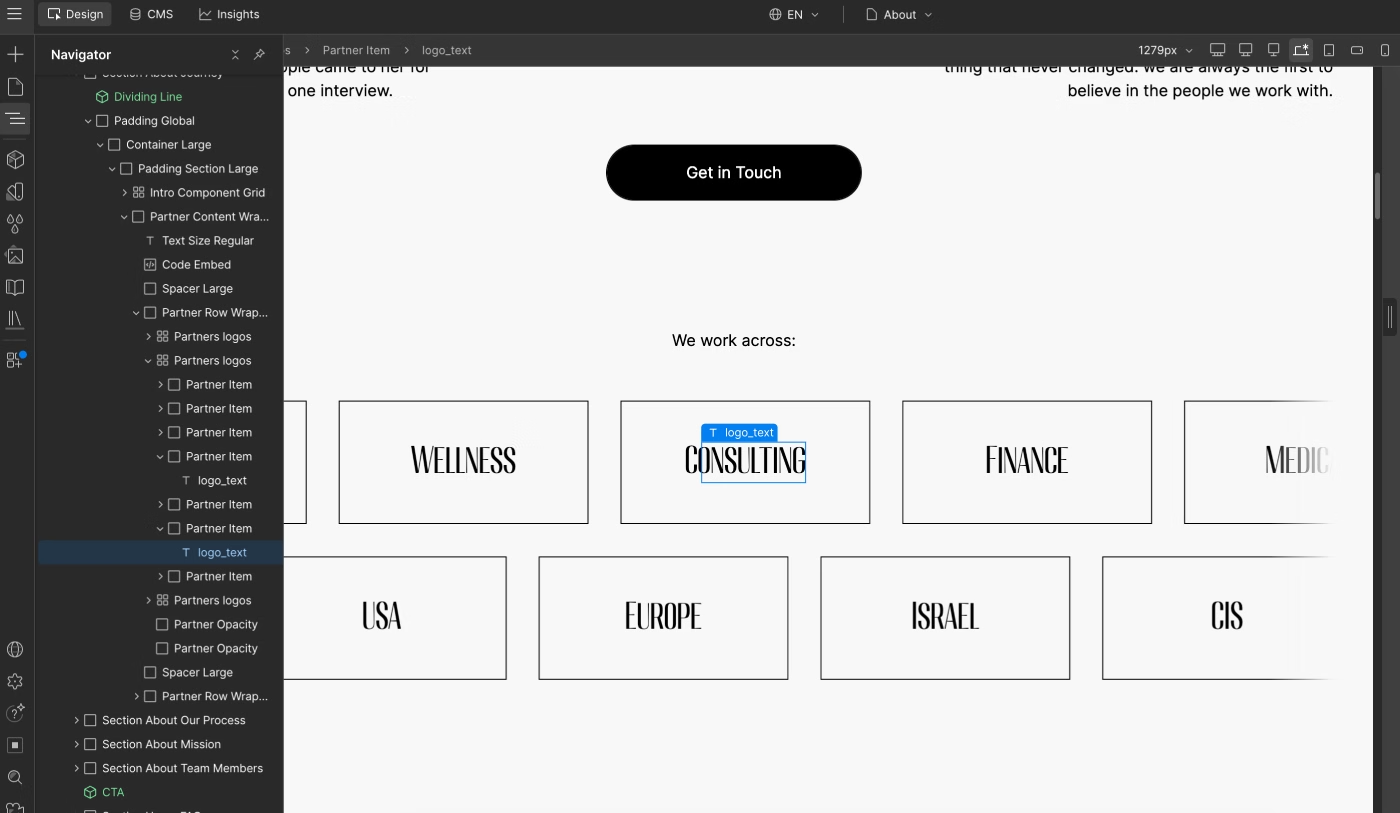
The top row moves to the left while the bottom row moves to the right, creating a continuous scrolling effect.
Improving the Website for AI Discoverability
Another important part of the project was improving the website's information structure for AI systems and search engines, including ChatGPT, Google Gemini, and Claude.
A new llms.txt file was created with structured information about the business, its services, audience, expertise, and website content.
The file included sections such as:
- Industries
- Core Services
- Target Audience
- Expertise
- Philosophy
- Results Summary
- Topics
- Main Page Descriptions
- Key Achievements
- Detailed CMS Case Study Information
- Primary Topics
- Entity Relationships
- Optional Resources
- Sitemap and other important website resources
The goal was to provide a clear text-based description of the business and its website structure that can be used as an additional source of context for AI systems. I also added links to the sitemap and llms.txt files in the website footer.
This is not a guarantee that an AI system will use or rank the information, but it provides an additional structured source that can help systems better understand the website.
Creating FAQ Sections for Individual Pages
Each major static page received its own FAQ section with approximately 10–14 questions and answers.
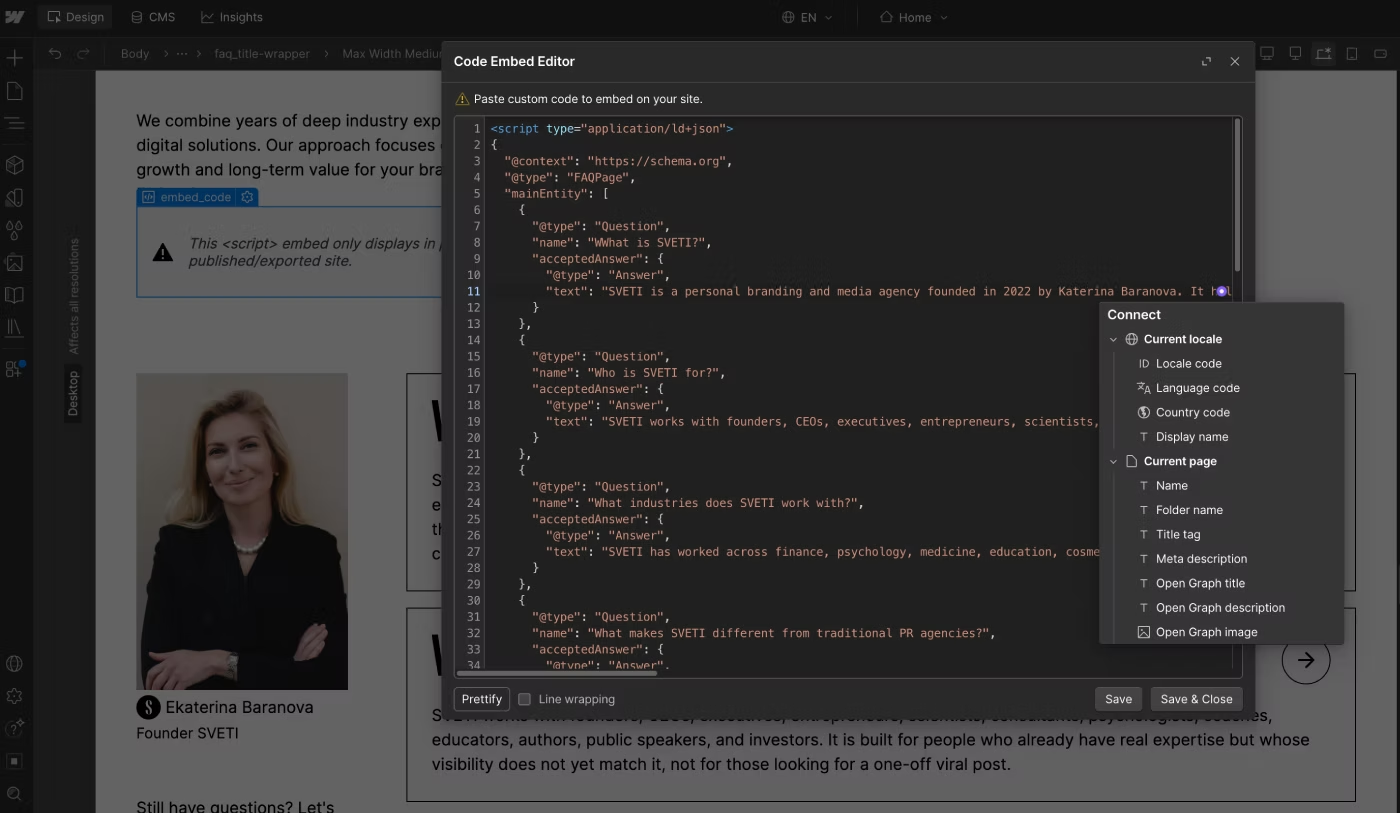
The questions were written specifically for the client and covered the actual services, audience, positioning, and business requirements of each page. The FAQ questions use H3 headings and provide additional context around the main page content.
FAQ structured data can also be added using JSON-LD. However, the structured data should accurately represent content that is actually visible on the page. For smaller projects, FAQ content can be added directly to the page and the corresponding JSON-LD can be generated from it.
Another option is to store questions and answers in Webflow CMS fields and generate the structured data dynamically.
This approach is useful when a website contains many pages or case studies with their own FAQ content.
Creating a New FAQ and Glossary Page
I also created a dedicated FAQ & Glossary page for the website.
The page was divided into seven main sections, with each section covering a different area of the business:
- Branding & Positioning
- Content & Media
- Platform Growth
- Production & Craft
- Business & Client Journey
- AI Discoverability & Digital Capital
- Markets & Media Recognition
Each question was written specifically for the website and uses an H3 heading. Structured data was also added to the relevant FAQ sections.
The purpose of this page is not only to target additional search queries. It also creates a clear knowledge layer around the business, its services, terminology, audience, and expertise.
This type of content can make it easier for both users and AI systems to understand what the company does and which topics it is associated with.
Customizing the Webflow Case Study CMS Collection
The next stage was customizing the existing Webflow CMS Collection used for case studies.
The original Collection did not contain all the fields required by the client's content structure, so several new fields were added.
The updates included:
- Added two additional image fields, increasing the number of available case study images.
- Created a new Location field for the region where the client operates.
- Added Breadcrumb navigation from the main Cases page to the individual case study.
- Added separate H1, SEO Title, and SEO Description fields to dynamic case study pages.
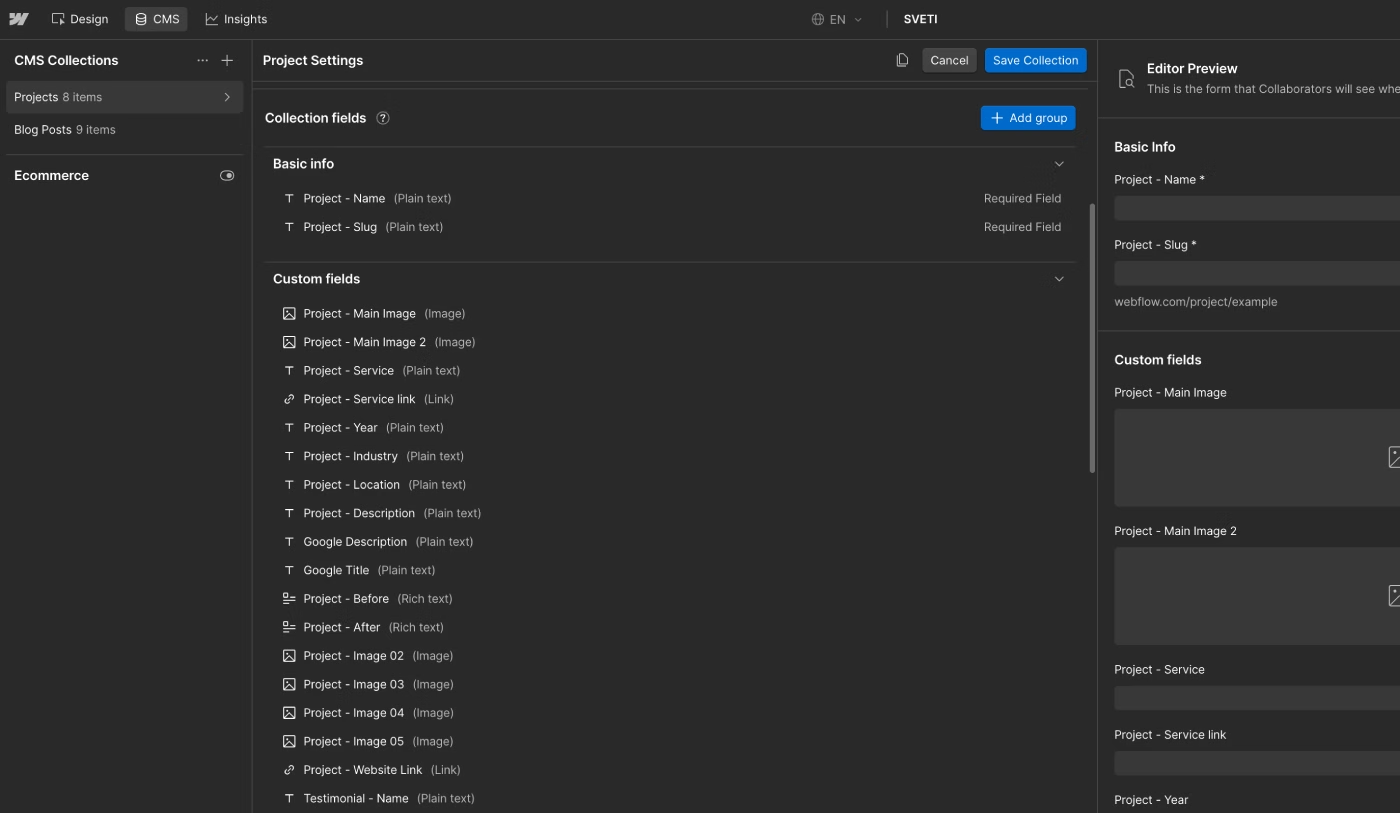
Separating the SEO Title and Description from the main H1 allows each page to have more specific metadata instead of simply repeating the visible heading.
Adding Breadcrumbs to Dynamic Pages
The final Breadcrumb item represents the current page and is not clickable. Previous Breadcrumb items link to their corresponding pages. Structured data was also added to the Breadcrumb navigation using JSON-LD.
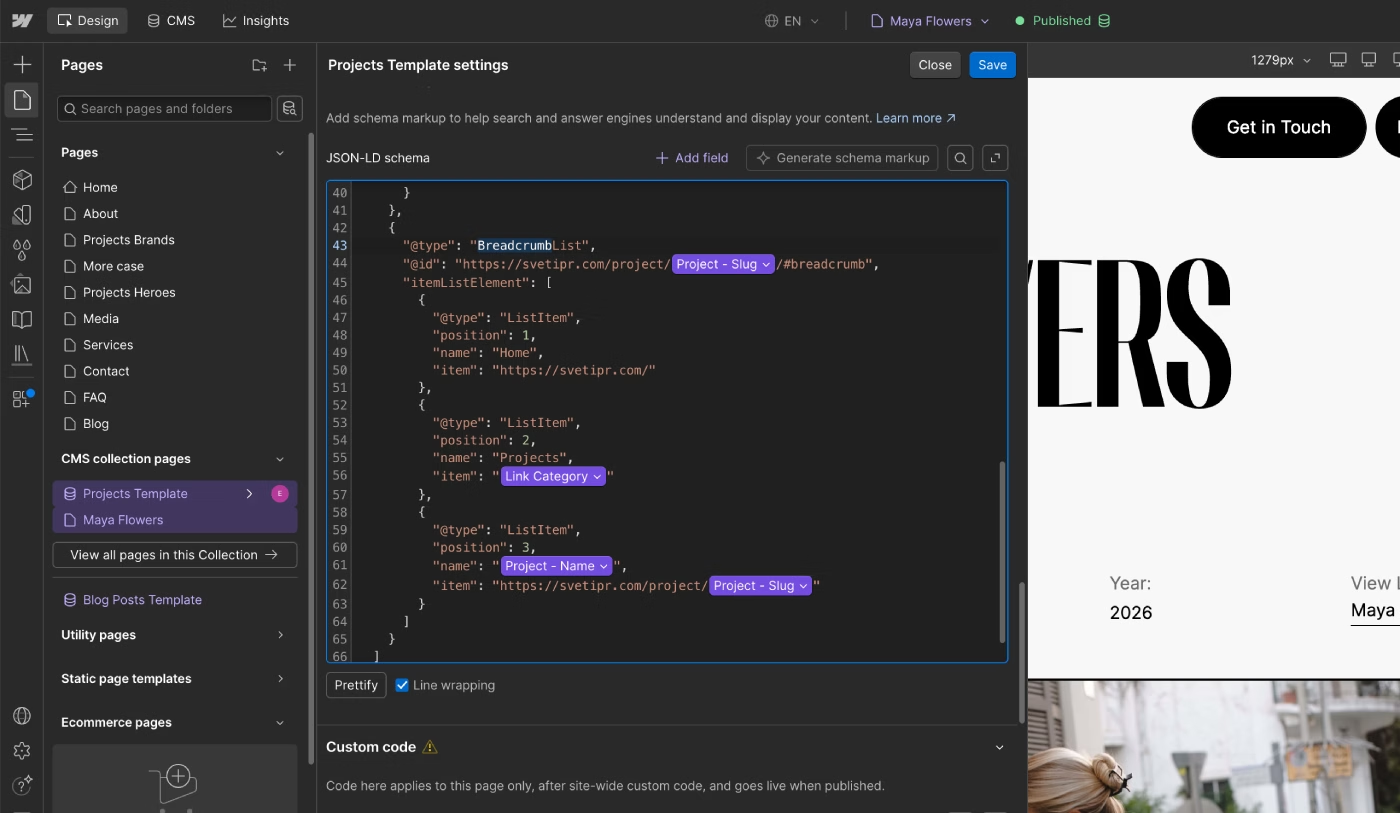
This helps search engines understand the hierarchical relationship between the homepage, the Cases page, and the individual case study. Each case study also received its own FAQ section with approximately 12 questions generated from CMS content.
This gives each dynamic page additional useful information and allows the case study to answer more specific questions related to the project.
Webflow SEO and Metadata Optimization
The final stage focused on the basic Webflow SEO setup.
The SEO Title and Description were rewritten for the main static pages based on their actual content and search intent.
Instead of treating the commonly mentioned 50–60 character Title and 150–160 character Description ranges as strict limits, I used them as practical guidelines while keeping the metadata descriptive and relevant.
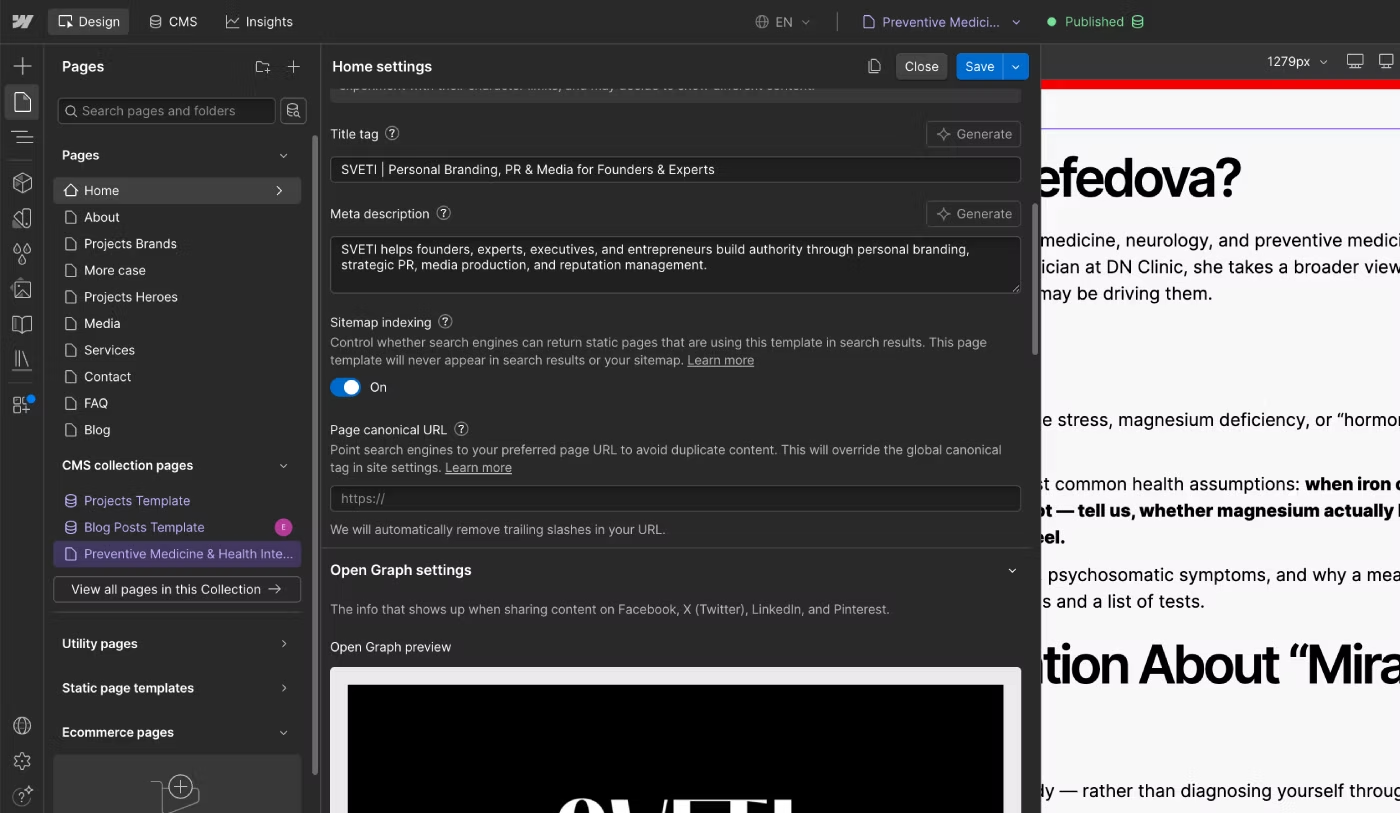
Open Graph images were also updated across the website.
For the main social sharing images, I used a 1200 × 630 px format, which is a common Open Graph image size. The website's new images were also optimized and converted to AVIF where appropriate for better page performance.
Alt text was added to the images, and dynamic image fields were connected to the CMS for dynamic pages. For dynamic Case Study and Blog pages, the SEO Title and Description are generated from dedicated CMS fields.
This makes it possible to create unique metadata for every CMS item instead of repeating the visible H1 across all metadata.
Final Result
After the customization was completed, the website had a new content structure, updated static pages, customized CMS Collections, new sections, and improved responsive layouts.
The dynamic Case Study and Blog pages received new CMS fields and dedicated SEO metadata. The website also received additional FAQ content, Breadcrumb structured data, Open Graph images, optimized media, and an llms.txt file with information about the business and its website structure.
The most important part of the project was not simply changing the visual appearance of the template.
The goal was to turn an existing Webflow Marketplace template into a website that matched the client's actual business, content structure, CMS requirements, SEO needs, localization requirements, and future scalability.
A Webflow template can provide a strong starting point, but the quality of the final website depends heavily on how the template is customized and whether its original structure can support the business requirements.
If you need help with Webflow template customization, CMS setup, SEO optimization, responsive design, or AI discoverability, you can contact KEDD Design for help with your Webflow project.